BY
Mike Hofius
SPANISH VERSION
In an attempt to clarify certain matters relating to the subject of sharpening hand turning tools, I have decided to put pen to paper and share my experience and that of those who came (and went) before me.
Many have shared on the internet views and opinions about the so called best way to sharpen turning chisels, gouges, parting tools and other such handtools. I will refrain from sharing ANY opinions and will impart through this short treatise, my EXPERIENCE, firstly handed down to me by the old-timers who taught me and who they themselves were taught by and who have gone on to that great mill shop in the sky; secondly, as confirmed by my own experience of 28 years. After all, these gentlemen were taught, generation after generation, certain methods which were proven by experience, probably as early as the late 18th century, when good tool steel became more available in Europe and in the Colonies of the Americas.
The opinions of those on the internet who have been hobbyist turners and have never had to earn their daily bread doing this trade/art for a living will no longer be addressed here. The information I share is proven by experience, is straightforward and will prove itself worthwhile to anyone interested in obtaining the kind of edge on their tools which will shave the hairs off one's forearm and will cut even dense woods properly, with relatively little need for sanding afterwards.
From Damascus to Spain to Japan, high quality steel has been around for quite a while. Some iron ore had naturally occuring high carbon content and, in some cases, tungsten as well.
The basic difference between iron ore and usable steel is the fact that when molten, steel has had carbon and oxygen forced into it and this smelting process has created a new molecular structure. On the molecular level, the molecules of steel can be made to align in such a way that they develop a high degree of hardness. And this level of hardness can be controlled through various means to meet different needs.
This high carbon steel or tool steel as it has traditionally been called, is used in the making of all sorts of items, from files to hoes and if it is made of this steel, it can usually be tempered to a wide variety of hardnesses. File-hard is the hardest it gets and cold-steel-hard is at the lower end of this hardness spectrum. Tools such as shovels, picks, sledge hammers and farm implements, are usually tempered down to this softer condition wherein they will not shatter upon impact. Try using a file to split firewood and you will find it quite brittle. Its hardness is too high for pounding on. A little further up the hardness ladder are masonry chisels and carpentry hammers and even further up the scale we find saws and other spring-hard steel. As one approaches the higher degrees of hardness, one encounters woodworking handtools with turning tools at the higher end of this category. Straw-hard is the ideal temper for the tools we will deal with in this article.
I mention hardness and tempering here only because we want to avoid loosing our temper or degree of hardness when we use our tools to work with or when we sharpen them. As we discuss the different aspects of sharpening, the necessary cautions will be made known. Suffice it to say that a dull tool will heat up more than a sharp tool, simply because of the greater friction created by the dull Burr of the unsharpened tool.
GRINDING
The first, coarsest, and potentially most damaging part of the sharpening process is grinding. Ideally, this is done on a grinding wheel of some sort, slowly, carefully, and with frequent quenching.
Since the advent of water, steam, and electric power, it has not been necessary to hand or foot crank the grinding wheel, at least not in the larger workshops. The experience of one of my mentors, John Mesitti, and mine also, is that the wheel should be 6 or 8 inches in diameter. Any larger and the hollow of the edge will not be deep enough. Any smaller and the hollow will be difficult to manage. So much for the modern sharpening systems which use a sanding belt type of abrasive surface on a wheel which is usually at least 10 inches in diameter. All these devices ever have done for me is overheat the edge I was trying to sharpen, and this even with the water cooled versions.
The grinding wheel itself should be a medium grit. Carborundum is quite adequate. Money doesn't buy everything in this case and something from the hardware store will work just fine. Finer grit wheels overheat the tool edge and coarser ones leave unusable bevels which are heavily grooved. The motor should be capable of maintaining a fairly constant speed while grinding. I have found that the 3/4 Horsepower variety are the smallest ones capable of doing this. Here a little more money spent will make a difference. It is also worth the $20 or so to get a decent dresser for the wheel. The handled kind with the star shaped, replaceable edges works best for me. I have never had luck with the carborundum sticks.
When grinding the tool it is EXTREMELY important to have a small pail of water (at least half a gallon) close to the wheel. I always, as a matter of habit, dip the tool first into the water while turning the grinder on and waiting for it to reach its speed. I usually grind a little, applying medium pressure against the spinning wheel. Too much concentration at one place on the edge causes it to heat up which is what we wish to avoid. Quench often, as often as between every 8 to 10 seconds of grinding, dipping the tool edge into the water quickly and leaving it in for 30 seconds or so, stirring all the time. This insures that the edge will not overheat and loose its temper.
The speed of the wheel can be within a fairly wide range but I have found that 2,000 to 3,500 RPM is best. Slower speeds will run with less vibration but if the speed is too slow, you get no where fast and you can't control the grind as well. Higher speeds can cause more vibration which is also hard to counteract while grinding. Worst of all, too high a speed will quickly burn the edge, ruining the temper at that part of the tool.
As to the angle of the bevel itself, this is a matter of experience and, somewhat, preference. If I know I am going to be turning a bunch of exterior balusters in Pine, I will grind my skew to a more acute angle than if I will be doing a lot of hardwood turning. If scrapers are being ground, I usually have no need to change the angle and tend to make them more acute than the factory grind, even if this means more frequent honing (see honing below). My large roughing gouge which I also use for smoothing long curves and straights (1.5" wide Sorby) has a bevel just a little more acute than my scrapers and my smaller gouges have a similar, if not more acute bevel. My skew (not scraper) chisel's bevel is much more acute and is usually between 15 and 20 degrees. This is the most important tool the spindle turner has and should be mastered. Scraping anything but a plankwise piece is folly and even when possible will require more sanding than anyone should wish to do. The skew is also the easiest to burn at the sharp tip. My heel-to-tip angle on this tool is usually more acute than most, but this also requires more experience to master. It also points to the fact that I use the tip and not the heel for most of my paring and certainly for cutting into squares and for forming beads and starting coves. Be careful when grinding the small gouges too. It is easy to lose your bevel and your profile. I don't use gouges for faceplate work which is by far, the least important work I get. The same rules apply to these, however. And, most importantly, quench often and don't grind your temper away.
![]()
WHETTING / HONING
To WHET is to sharpen, one of those verbs we got from the Anglo-Saxons.
What it means to the woodworker is to sharpen the tool cutting edge by using a medium grit stone. Here medium means medium India or carborundum stone. You don't need to spend a lot of money on Arkansas stones for turning. I don't even use them for handcarving. You want a medium grit stone and not a very fine stone.
The purpose of the whetting stage of this process is to remove the burr that the grinding wheel leaves on the edge. When you look closely at your grind, you will see the work edge of the bevel and the heel edge further up the tool and some grind marks running between them, roughly perpendicular to them both. This is all you should see. A proper grind will have no stop-and-start ridges and will have no change-in-bevel ridges. Just grinding grooves running between heel and tip. There will also be a little burring on the work edge.
I use heavy mineral oil as the lubricant for whetting and honing. What I look for is not really a lubricant but rather, a vehicle which will tend to float the steel particles I am removing out of the stone's pores. So heavy is good. John Mesitti and I differed on this one. He thinned motor oil with kerosene. I have never liked to have the stuff on my hands, specially when working with wood. The mineral oil is cheap, non-toxic and good for the digestion. Motor oil and kerosene are not.
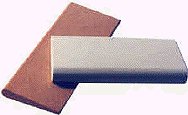 I use India slip stones, such as are used by woodcarvers. I have also used carborundum in the past but they don't last long and do no better nor worse a job. It is frustrating to have a stone with divets, however. The medium India stone I use for whetting and the fine India stone I use for honing have been in service for roughly 18 years and have not worn hardly at all.
With gouges I place a drop or two of oil on the inside radius. I then run the radius of the slipstone which best fits this inside radius back and forth about 8 or 10 times. This leaves some oil on the bevel of the work edge. Then, I take a flat face of the stone and run it back and forth, on the bevel and around the radius of the bevel a few times. This shouldn't be overdone; a few quick strokes is all that is needed to remove the burr. The stone should always be in contact with the heel edge of the bevel and the work edge of the bevel. It should never touch only one of these edges.
With scrapers the process is the same as for gouges. The upper face of the tool should be whetted first and then the bevel. With spindle-turning skews and parting tools, do the bevel whetting on both surfaces.
The purpose of honing is to more finely sharpen the bevel. My fine India is used for this purpose and the technique is a repetition of the whetting process described above. One again, it should not be necessary to overdo this. A few passes will suffice.
![]()
STROPPING
When one carves wood, one should have a leather strop to remove the finest burrs from the cutting edge.
With woodturning, this is excessive. My tools are sharp enough to shave my arms when I have finished honing them. Stropping is not only time consuming but superfluous here. I usually can get three good whettings and honings from each grind. I will at times stretch this so as to not have to grind away my tools as quickly but only when a soft wood is being turned and when it isn't tearing out. Remember, a sharp tool, cutting cleanly, is easier to handle and will make the creation of fine details much more accurate, with less risk of burning the edge and more quickly.
![]()
Whether you turn bowls or other faceplate articles or if you prefer to turn between centers, these methods of achieving a sharp edge should work for you with little practice and with a degree of care. Remember, heat is the enemy, not your fear of sharpening. Once you have a little experience at it, maintaining a sharp, useful edge will be part of the experience. Don't view it as a chore, but as part of the art of turning.
Respectfully, Mike